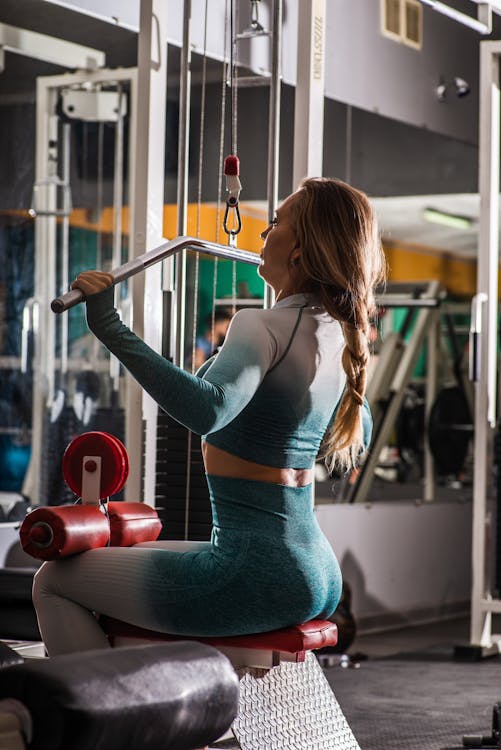
The Smith machine is a versatile piece of equipment that can be used for a variety of exercises, including back exercises. While some people believe that the Smith machine is not as effective as free weights for back training, it can still be a great way to build and tone your back muscles.
In this article, we will discuss the 5 best Smith machine back exercises. These exercises are all effective for targeting different areas of the back, and they can be modified to fit your individual fitness level.
We will also provide tips on how to perform each exercise safely and effectively. In order to help you develop a stronger and more muscular back, this article offers advice for both novice and expert lifters.
Here are the 5 best Smith machine back exercises:
- Bent-over row
- Rack pulls
- Inverted rows
- Single-arm row
- Shrugs
Bent-over row
The latissimus dorsi, rhomboids, Trapezius, and erector spinae are among the back muscles used by the complex exercise known as the bent-over row. It also works the biceps and forearms.
To do a bent-over row, stand with your feet shoulder-width apart and bend over at the waist until your torso is almost parallel to the ground. Keep your back straight and your core engaged. Grip a barbell or dumbbells with an overhand grip, with your hands shoulder-width apart. Pull the weight up towards your chest, keeping your elbows close to your sides. Lower the weight back to the starting position and repeat.
The bent-over row can be done with a variety of weights and repetitions. For beginners, it is recommended to start with a light weight and do 10-12 repetitions per set. As you get stronger, you can increase the weight and/or the number of repetitions.
The bent-over row is a great exercise for improving back strength and size. It can also help to improve posture and prevent back pain. If you are looking for an effective way to strengthen your back, the bent-over row is a great option.
Here are some tips for doing the bent-over row correctly:
- Keep your back straight throughout the entire movement.
- Engage your core to help stabilize your body.
- Pull the weight up towards your chest, keeping your elbows close to your sides.
- Lower the weight back to the starting position slowly and controlled.
- Do not round your back at any point during the movement.
Rack pulls
Rack pulls are a variation of the deadlift that is performed from a height that is slightly below or above the knees. This reduced range of motion allows you to lift heavier weights than you would be able to with a full deadlift, which can help you to build strength and power in your posterior chain.
The muscles worked by rack pulls include the:
- Hamstrings
- Glutes
- Quads
- Trapezius
- Back muscles
- Erector spinae (lower back)
To do a rack pull, you will need a power rack with safety bars. Set the safety bars to the desired height, then load the barbell with weights. Stand with your feet shoulder-width apart and your toes pointing forward. Bend your knees slightly and grab the bar with an overhand or mixed grip. Brace your core and lift the bar up by extending your hips and knees. Keep the bar close to your body throughout the movement. Lock out your hips and knees at the top of the movement, then lower the bar back to the safety bars.
Rack pulls are a great way to build strength and power in your posterior chain. They can also be used to improve your grip strength and to help you learn the proper form for the deadlift. If you are looking for a challenging and effective exercise to add to your strength training routine, then rack pulls are a great option.
Here are some tips for doing rack pulls safely and effectively:
- Use a weight that is challenging but that you can still lift with good form.
- Keep your back straight throughout the movement.
- Breathe out as you lift the bar and breathe in as you lower it.
- Use a spotter if you are lifting heavy weights.
If you are new to rack pulls, start with a light weight and gradually increase the weight as you get stronger. And always listen to your body and stop if you feel any pain.
Inverted rows
Inverted rows are a great bodyweight exercise that works the muscles of the upper back, including the trapezius and latissimus dorsi. They can also help to improve grip strength, recruit the glutes and hamstrings, and give your biceps a boost.
To do an inverted row, start by hanging from a pull-up bar with your hands shoulder-width apart. Your body should be in a straight line from your head to your heels. Engage your core and pull yourself up until your chest touches the bar. Take a brief pause before lowering yourself back to the starting position.
As you get stronger, you can make the exercise more challenging by placing your feet on a box or bench, or by using a lower bar. You can also add weight to the exercise by wearing a weighted vest or holding a dumbbell between your feet.
Inverted rows are a great way to build strength and muscle in your upper back. They are also a low-impact exercise that is easy on your joints. If you are looking for a challenging and effective way to work your back, inverted rows are a great option.
Here are some tips for doing inverted rows with proper form:
- Keep your body in a straight line from your head to your heels.
- Engage your core throughout the entire movement.
- Pull yourself up until your chest touches the bar.
- Pause for a second at the top, then lower yourself back down slowly.
- Don't let your hips sag or your back arch.
If you are new to inverted rows, start with a few sets of 5-10 reps. As you get stronger, you can gradually increase the number of reps and sets.
Single-arm row
The single-arm row is a great exercise for targeting the back muscles, including the lats, trapezius, rhomboids, and rear deltoids. It is also a good way to strengthen the core and biceps.
To do a single-arm row, you will need a dumbbell and a bench. Start by kneeling on the bench with your left knee and your left hand on the bench for support. Your right arm should be extended straight down with the dumbbell in your hand. Your back should be straight and your core engaged.
Exhale and row the dumbbell up to your side, keeping your elbow close to your body. Your upper arm should be parallel to the floor at the top of the movement. Pause, then slowly lower the dumbbell back to the starting position.
Repeat this movement for 8-12 repetitions on each side.
Here are some tips for doing the single-arm row correctly:
- Keep your back straight throughout the movement.
- Engage your core to stabilize your torso.
- Pull the dumbbell up with your back muscles, not your biceps.
- Pause at the top of the movement to focus on the contraction.
- Lower the dumbbell slowly and under control.
The single-arm row is a great exercise to add to your back workout routine. It is a challenging exercise, but it is also very effective for building back strength and size.
Here are some additional benefits of doing single-arm rows:
- They help to improve posture.
- They can help to prevent back pain.
- They can help to improve grip strength.
- They can help to burn calories and promote fat loss.
If you are new to the single-arm row, start with a light weight and gradually increase the weight as you get stronger. Be sure to listen to your body and stop if you feel any pain.
Shrugs
Shrugs are a simple yet effective exercise that can help to strengthen the trapezius muscles, which are located in the upper back. The trapezius muscles are responsible for lifting the shoulders, shrugging the shoulders, and rotating the shoulders.
To do shrugs, you will need a pair of dumbbells. Start by standing with your feet shoulder-width apart and your arms at your sides. Hold the dumbbells with a neutral grip, with your palms facing each other. Inhale and raise your shoulders up towards your ears, keeping your arms straight. Hold the contraction for a second, then exhale and slowly lower your shoulders back down to the starting position.
Repeat this movement for 10-12 repetitions, then rest for a minute. Do 3 sets of 10-12 repetitions for a complete workout.
Here are some tips for doing shrugs safely and effectively:
- Keep your back straight throughout the movement.
- Don't use your biceps to lift the dumbbells.
- Don't shrug your shoulders too high.
- Lower the dumbbells slowly and controllably.
Shrugs can be done with a variety of weights, depending on your strength level. If you are new to shrugs, start with a light weight and gradually increase the weight as you get stronger.
Shrugs are a great exercise to add to your workout routine if you want to strengthen your upper back muscles. They can also help to improve your posture and reduce shoulder pain.
Conclusion:
These exercises are all effective for targeting different areas of the back, and they can be modified to fit your individual fitness level.
We have also provided tips on how to perform each exercise safely and effectively. The information in this article will thus help you develop a stronger and more muscular back whether you are a novice or an experienced lifter.

